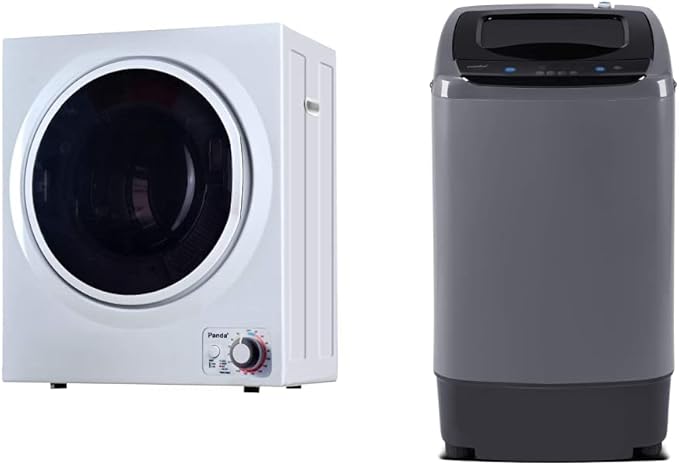
A washing machine is an appliance that is used by families often but do not pay attention to periodic cleaning of the washing machine. The washing machine is in direct contact with the dirt in the clothes, so cleaning the washing machine is extremely necessary. Washing machines that are cleaned regularly will help prevent mold, and bacteria from multiplying, etc. From there, help clean clothes, and protect your family's health. The following article Smart Home Review shares with you simple steps to clean washing machines at home safely and economically.
1. Why should the washing machine be cleaned periodically?
A drum is a place that is often exposed to dirty clothes, bacteria, and fabric dust. After a period of operation, these impurities will accumulate inside the drum, blocking the filter and draining system, and leading to easy damage to the washing machine. If only from the outside, it would be difficult to detect only when removing the cage and related parts, how dirty the washing machine is.
Therefore, if the drum is not cleaned and removed in time when the washing machine works, these residues will fall off and stick to the clothes. Not only does it lead to an unclean wash, but also an unpleasant musty smell on the clothes.
The implementation of washing machine cleaning methods needs to be done regularly, especially how to clean the washing machine drum for reasons such as:
Most dirt is discharged along with wastewater through the pipe behind the machine, but soap, cleaning chemicals, stubborn dirt, or lime will stick in the drum, which over time will accumulate. clog the filters.
The dirt in the drum creates an ideal environment for bacteria to grow that clogs the internal mechanisms. The water in the washing machine won't be hot and the detergent won't work as well as it should.
The environment inside the washing machine is always hot and humid. If you don't clean the washing machine regularly, it will create an environment for bacteria to multiply and spread.
A washing machine that has not been cleaned for a long time will produce a bad smell. Even if this smell spreads to clothes, it will not be good for health.
In addition, regular washing machine cleaning also brings many benefits such as:
Extend the life of the machine
Deodorize, and remove bacteria, residue, and dust inside the washing machine
Helps clothes to be washed cleaner
Increase machine performance
Protect the washing machine from deterioration and damage
How often should the washing machine be cleaned?
If the washing machine serves the daily needs of households, the appropriate time to conduct cleaning is once every 3-4 months. This will ensure the washing machine can operate smoothly, avoiding problems when used.
If the washing machine has to be used often and the amount of laundry is large, like a laundromat, the necessary cleaning time is 1-2 months. Due to the rapid accumulation of dirt, it is very predictable if left for too long.
Source: Amazon
2. Instructions for cleaning the top load washing machine (standing drum washing machine)
Preparing instruments
You need to prepare some necessary items before cleaning the top load washing machine such as detergent (soap, dishwashing liquid, ..), toothbrush or sponge, brush, mop, tassel screw, and pressure pump (if any).
Steps to clean top load washing machine
-
Step 1: Check the washing machine
Before cleaning, you need to check a few issues as follows:
Is the washing machine still working properly?
Is the washing machine damaged anywhere?
Does the spin function still work?
Does the machine make noises or squeaks when operating?
If the machine is found to be damaged or malfunctioning, you need to contact the service center or call the machine repair team before cleaning the machine.
-
Step 2: Remove the control panel
Use a screwdriver to remove the screws that secure the top of the washing machine.
Then sequentially remove the top cover, right at the water supply position.
Remove the washing machine control panel, you need to be careful in this step to avoid breaking the power cord.
Remove the screw fixing the top face to the body.
Remove the top cover of the washing machine.
-
Step 3: Remove the washing tray and washing tub
You unscrew the screws that secure the washing tub with a screwdriver.
Remove the round plastic piece from the washing tub.
Unscrew the screw fixing the washing tub to the washing tray.
Then carefully lift the tub out of the washing machine.
-
Step 4: Clean the drum
You use a pressure pump or water hose to spray the washing tub inside and out, along with the machine's accessories, and plastic cover on the top.
Remove the filter mesh (attached to the body of the washing tub) to clean the dirt inside.
Spray wash, and clean the washing tub inside.
Clean the outer drum (where there is no washing liquid during the washing process), you can use a brush and detergent solution to clean stubborn stains and small components attached.
-
Step 5: Assemble components and wipe clean
Use a pre-cleaning rag and assemble the drum, top plastic cover, control panel, and components to the body, tightening the fixing screws together. Once assembled, use a clean cloth to dry it again
-
Step 6: Finish and check the product again
After cleaning and reassembling, you need to press start the machine to check if the washing machine is working properly before using it.
Source: Amazon
3. Instructions for cleaning front-load washing machines (horizontal drum washing machines)
Preparing instruments
Before cleaning the front-loading washing machine, you need to prepare some of the following tools: Water, neutral detergent (all-purpose cleaner can be purchased at convenience stores or supermarkets), toothbrush, broom, and mop
Steps to clean front load washing machine
-
Step 1: Check the washing machine
Before proceeding to clean the front load washing machine, you need to check that it is working properly by following the following procedure:
Is the washing machine working normally?
Are components and parts damaged?
If your washing machine has a problem or damage, you should contact the service center or repairman before cleaning.
-
Step 2: Remove the top and back cover
Use a 4-prong screwdriver to unscrew the back screw and remove the back of the washing machine.
Next, unscrew the top screw and remove the top cover on the washing machine.
-
Step 3: Remove the cement block weighing the drum and the water, soap, and control panel
Use the lock to remove the cement block weighing the washing tub.
Remove the soap dispenser, remove the screws first, and lift the water supply box out.
Unplug the jacks, and remove the control circuit (pay attention to avoid jerking out and causing the mount to break).
-
Step 4: Remove the washing machine door, belt, fork, motor
Use the lock to remove the front of the machine right at the door of the washing tub.
Unplug all motor jacks and resistors,...
Remove the fork fixing the washing tub.
Remove the belt and motor screws from the drum.
-
Step 5: Separate the washing tub
Use the lock to open the connecting screws to separate the washing tub.
-
Step 6: Clean and reinstall the washing machine after cleaning
Use a high-pressure spray nozzle to quickly remove dirt and mold.
Use mild detergents such as soap, and dishwashing liquid to remove the remaining stains once again.
Next, use a clean towel to dry the washing tub and the drum cover.
Reassemble the washing machine and check whether the device is working properly or not.
Source: Amazon
4. Conclusion:
We hope that the information above the article is useful to you and helps you gain more knowledge when using a washing machine, helps you save money so your washing machine can work at its best.


